

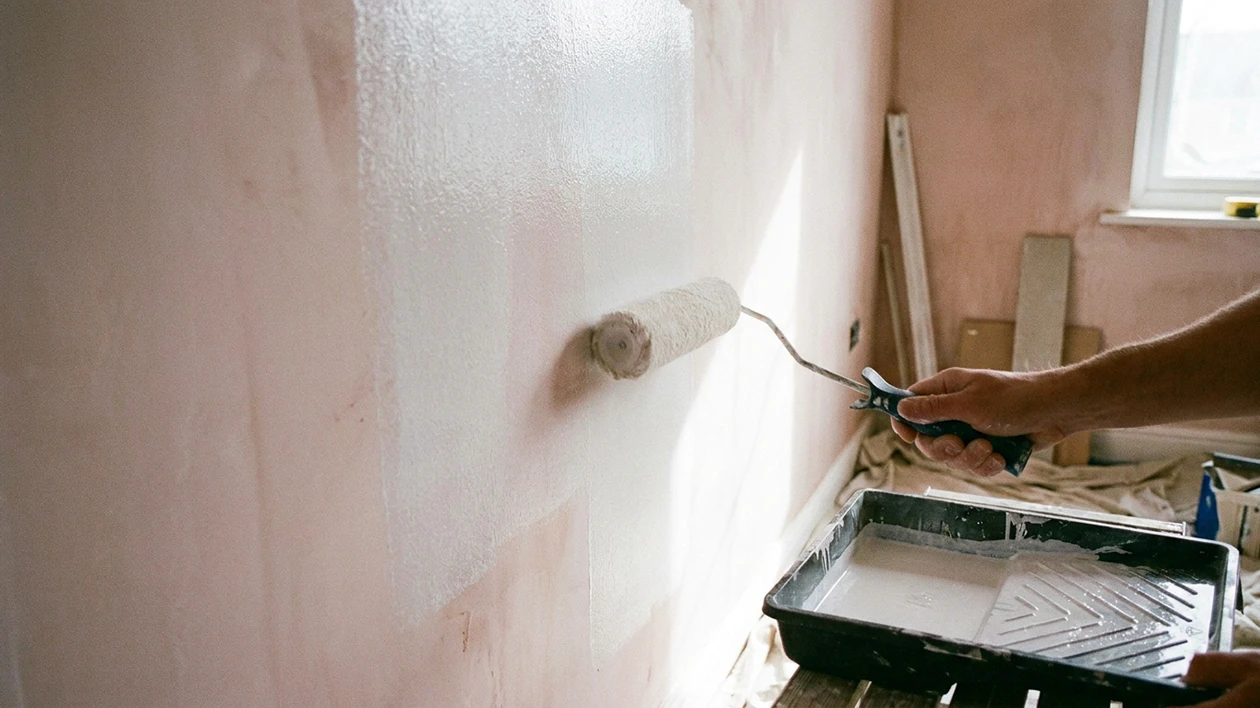
No, you cannot paint straight onto fresh plaster with a standard topcoat. Plaster is highly porous and will pull the moisture out of ordinary paint before it has a chance to cure. The result is paint that cracks, flakes and peels away in sheets, sometimes within weeks. Painting plaster properly means sealing it first, either with a diluted “mist coat” or a dedicated acrylic sealer undercoat.
Get this one step right and the wall holds its finish for years. Get it wrong and you will be scraping it back before the year is out. Here is how our team does it.
What Do You Put Over Plaster Before Painting? The Mist Coat Recipe
Before painting new plaster, apply a mist coat, which is simply a water-based flat acrylic paint thinned with clean water. The thinned paint soaks in rather than sitting on top. It binds to the plaster and leaves a chalky base your topcoat can grip.
The mixing ratio
70% flat water-based acrylic to 30% clean water. That is 7 parts paint to 3 parts water.
Use the right paint. A basic flat (matt) water-based acrylic is what you want. Do not mist coat with low sheen, semi gloss, satin or any paint carrying a heavy sheen additive. Those products form a film on the surface instead of soaking in, and that film will lift off the plaster later. If the tin talks about washability, scrub resistance or a sheen level above flat, it is the wrong product for this job.
How to prepare the plaster before you seal it
Fill any dents and hairline cracks, let the filler dry, then sand the wall lightly with 120 to 180 grit. You are not trying to remove plaster, only to knock off ridges, trowel marks and raised filler. Run a hand across the wall afterwards. If you can feel a bump, it will show through the paint.
Then get every trace of dust off the wall with a vacuum and brush attachment, or a microfibre cloth. Plaster dust is fine enough that paint will not grip through it, and this is the single most common reason a correctly mixed mist coat still fails. Do not wash new plaster down with water. A lightly damp cloth is as wet as it should get, and the surface needs to dry again before you seal it.
Step by step
- Verify the plaster is dry. The whole wall should be a uniform, light colour with no darker patches, particularly in corners, along the cornice line and behind where furniture sits. Some plasters dry to a pale pink, others to an off-white or pale grey. What matters is uniformity, not the exact colour.
- Mix the solution. Pour 7 parts flat acrylic and 3 parts clean water into a large bucket. Stir with a mixing stick for two to three minutes until it reaches the consistency of thin cream. Mix enough for the entire room in one batch so the dilution stays consistent wall to wall.
- Cut in first. Use a synthetic brush to cut the corners, edges, cornices and skirting lines.
- Roll the walls. Use a 10 to 12mm nap roller and work in sections of roughly one metre. Be warned, a mist coat is watery and it will drip and spatter heavily. Drop sheets across the full floor, not just along the wall line, and mask anything you care about.
- Let it dry. Allow a full 24 hours before the first topcoat, or whatever the tin specifies, whichever is longer.
Try this now
- Run a bare hand across the plaster. If it feels cold or damp to the touch, or looks darker in patches, it is not ready. Give it another 24 to 48 hours and test again.
- Read your paint tin before you mix. You are looking for a flat or matt water-based acrylic with no sheen additives.
How long does new plaster take to dry?
Between one and four weeks for a freshly plastered wall, depending on thickness, ventilation and the weather. Small patches can be ready in two to five days. A thin skim coat usually needs five to ten. Thick plaster in a closed-up room can take longer than four weeks.
In a humid Sydney February we allow longer than we would in June. Open the room up, keep air moving with a fan, and do not point a heater straight at the wall.
Can a moisture meter tell you the plaster is ready?
No. This is where most advice falls over.
Master Painters and Decorators Australia went looking for the cause of plaster walls failing. They built a test wall: five plaster panels at different lime ratios, painted across seven sections, giving 35 surfaces including five controls. Each one cured for 30 days, then got tested four ways. Moisture meter readings did not identify the panel with deliberately weak plaster. Neither did pH testing. Neither test predicted which surfaces would go on to fail.
There is no Australian standard for an acceptable moisture level in plaster before painting. The industry works to an unofficial 10 per cent. Even that moves with the meter you use and how well it is calibrated.
In the worst failures, the wall looked perfect. Then the paint and plaster came off with sticky tape, Blu-Tack, even a Post-it Note.
The practical lesson: a gadget reading will not save you. Time, ventilation and a trained eye will. If you are in any doubt, wait longer.
What Happens If You Paint Straight Onto Plaster?
If you apply a standard topcoat directly to unsealed plaster, the plaster instantly draws the water out of the paint. The paint dries far too fast, the binders never get the chance to form a proper film, and what is left is a layer of pigment sitting loosely on a dusty surface. It cracks, flakes and eventually peels off in sheets, often lifting like wallpaper when you catch an edge.
Think of fresh plaster as a very large sponge. Modern acrylic paints rely on polymer binders that need time and moisture to knit together. Apply one to unsealed plaster and the wall steals the moisture in seconds, leaving the polymer with nothing to bond to. The same absorption problem shows up when painting bricks and bare render. It is a different problem to painting over old paint, where the surface is already sealed and the question is adhesion rather than absorption.
Key takeaway: skipping the mist coat saves you two hours today and costs you a weekend of scraping and re-prepping next month. Seal the plaster first, every time.
What Is the Best Paint to Use on Plaster?
The best first coat on new plaster is a basic flat water-based acrylic thinned with water, or a purpose-made acrylic sealer undercoat. If you would rather not mix, Dulux 1Step Prep Primer Sealer and Undercoat is the standard call for plaster sheet and set plaster walls in Australia. As a Dulux Accredited Painter it is what we specify on most new work, and it lets us register the applicable Dulux product warranties for our clients.
The best topcoat, once the surface is sealed, is a quality low sheen acrylic for living areas, bedrooms and hallways. For bathrooms, kitchens and laundries, use a washable or mould-resistant product built for steam and regular cleaning. Ceilings are usually finished flat, which hides minor imperfections better than any sheen will.
How many coats? Most new plaster walls need one sealer or mist coat followed by two top coats. Deep colours and feature walls often need a third. Two thin even coats always beat one heavy one.
Sealing new plaster: mist coat vs sealer undercoat
| Decision criteria | DIY mist coat (flat acrylic + water) | Dedicated acrylic sealer undercoat |
|---|---|---|
| Cost | Lower, uses a basic paint you thin yourself | Higher, premium purpose-built product |
| Mess level | Very high, watery and drips easily | Low to medium, thicker and more controlled |
| Breathability | Excellent, lets the plaster continue curing | Good, formulated specifically for new surfaces |
| Consistency of result | Depends on how well you mix and apply | Consistent straight from the tin |
| Best for | Whole rooms on a tight budget, where you can protect the floors properly | Small areas, occupied homes, or anyone wanting no mixing and less mess |
Plasterboard or solid plaster?
Most Australian homes built in the last forty years have plasterboard with set joints rather than solid plaster. On plasterboard a sealer undercoat is usually the better call, because it evens out the difference in porosity between the board face and the jointing compound. Skip that step and the joints flash through the topcoat as visible bands once the light hits them.
Solid plaster over brick, the kind you find in older Sydney homes and in some new builds, is more absorbent again and is where the mist coat earns its keep. The same approach applies across most apartment painting jobs and the common areas we handle on strata painting work.
Common Mistakes When Painting Plaster
Run your plan past these four before you open a tin.
1. Painting before the plaster has cured
How to spot it: the wall reads as uniform at a glance but there are faint darker patches in corners or low on the wall.
Fix: stop and wait. Open the room up, run a fan or a dehumidifier, and give it another week if you are unsure.
2. Using a sheened paint for the mist coat
How to spot it: you grabbed a low sheen or washable acrylic off the shelf without checking the sheen level.
Fix: swap it for a flat acrylic. Sheened products seal moisture inside the plaster, which can cause it to blow and crumble later, and the film peels rather than bonding.
3. Mixing the mist coat too thick
How to spot it: it is covering opaquely in one pass and barely dripping off the roller.
Fix: add more water. A mist coat should look semi-transparent and feel watery. Its job is to soak in, not to sit on top.
4. Sealing over plaster dust
How to spot it: you sanded the wall and went straight to the mist coat, or you can still see a fine film when you wipe a hand down the plaster.
Fix: vacuum the wall with a brush attachment and wipe it down before you seal. Paint will not bond through dust, and the failure looks identical to a moisture problem, which sends most people chasing the wrong cause.
How to know you got it right
- The mist coat soaked into the wall within a few minutes of rolling.
- Once dry, the surface feels slightly rough and chalky to the touch.
- Your topcoat glides on without dragging and without flashing dry on the roller.
Can you paint straight over old plaster?
Usually yes, if the wall is sound and already sealed by previous coats of paint. Old bare plaster is a different matter and needs the same mist coat or sealer treatment as a new wall. We have covered the already-painted case separately in our guide to painting over old paint.
When to Bring in a Professional
New plaster is one of those jobs where the prep decides everything and the mistakes only show up later. If you are dealing with a whole home, high ceilings, a heritage property with solid plaster walls, or plaster that is already showing signs of a failed paint job, it is worth having trade professionals handle it.
AS/NZS 2311, the Standard that governs painting work in Australia, makes a point most homeowners never hear. Painting a surface can be taken as accepting that the surface was fit to paint. If the plaster or render was not ready, the painter who applied the first coat can end up wearing the failure. That is why a good painter will tell you a wall is not ready rather than get started, and why we check the wall properly instead of guessing.
The same Standard also flags something particularly relevant to Sydney. Render applied in hot, windy conditions, laid too thinly, or applied over a porous wall can dry out far too quickly and leave a weak, poorly adhering base. The Standard’s own words for what follows are efflorescence, saponification and delamination. In plain terms: salt bloom on the surface, paint that turns soft and sticky, and render that comes away from the wall with the paint still attached. A hot northerly in January is exactly that. It is why we watch new render through summer rather than trusting the calendar on exterior painting jobs.
Once the plaster is sealed and stable, the rest is standard interior painting work.
Upscale Painting & Decorating has been painting homes and commercial properties across Sydney since 2016. We are Dulux Accredited, certified with Master Painters Australia, fully licensed and insured (NSW Licence No. 302447C), and every painter on our team averages over 10 years on the tools. All of our work is backed by a 100% workmanship guarantee with a written warranty, and we turn up on time and finish on budget.
Call us today on 0490 094 862 for an obligation-free quote, or email info@upscalepainting.com.au. We service the Eastern Suburbs, North Shore, Inner West and Sutherland Shire, and we are contactable 24 hours.